Video management system (VMS)
This guide documents how to configure video and data recording sources in the Cogniteam Cloud and how to review recordings in the Recordings page. Recordings on the edge can use a DVR mechanism.
Why DVR matters
The Cogniteam Agent embeds a DVR-style recorder that keeps context around every event. Auto-start capabilities paired with 30-second pre/post buffers let you capture the moments leading up to and following an incident without keeping every stream running all the time. You can trigger recordings manually, via rules, or rely on the auto-record option described below.
Navigate to Robots > [Robot Name] > Settings > Recordings to manage your recording sources.
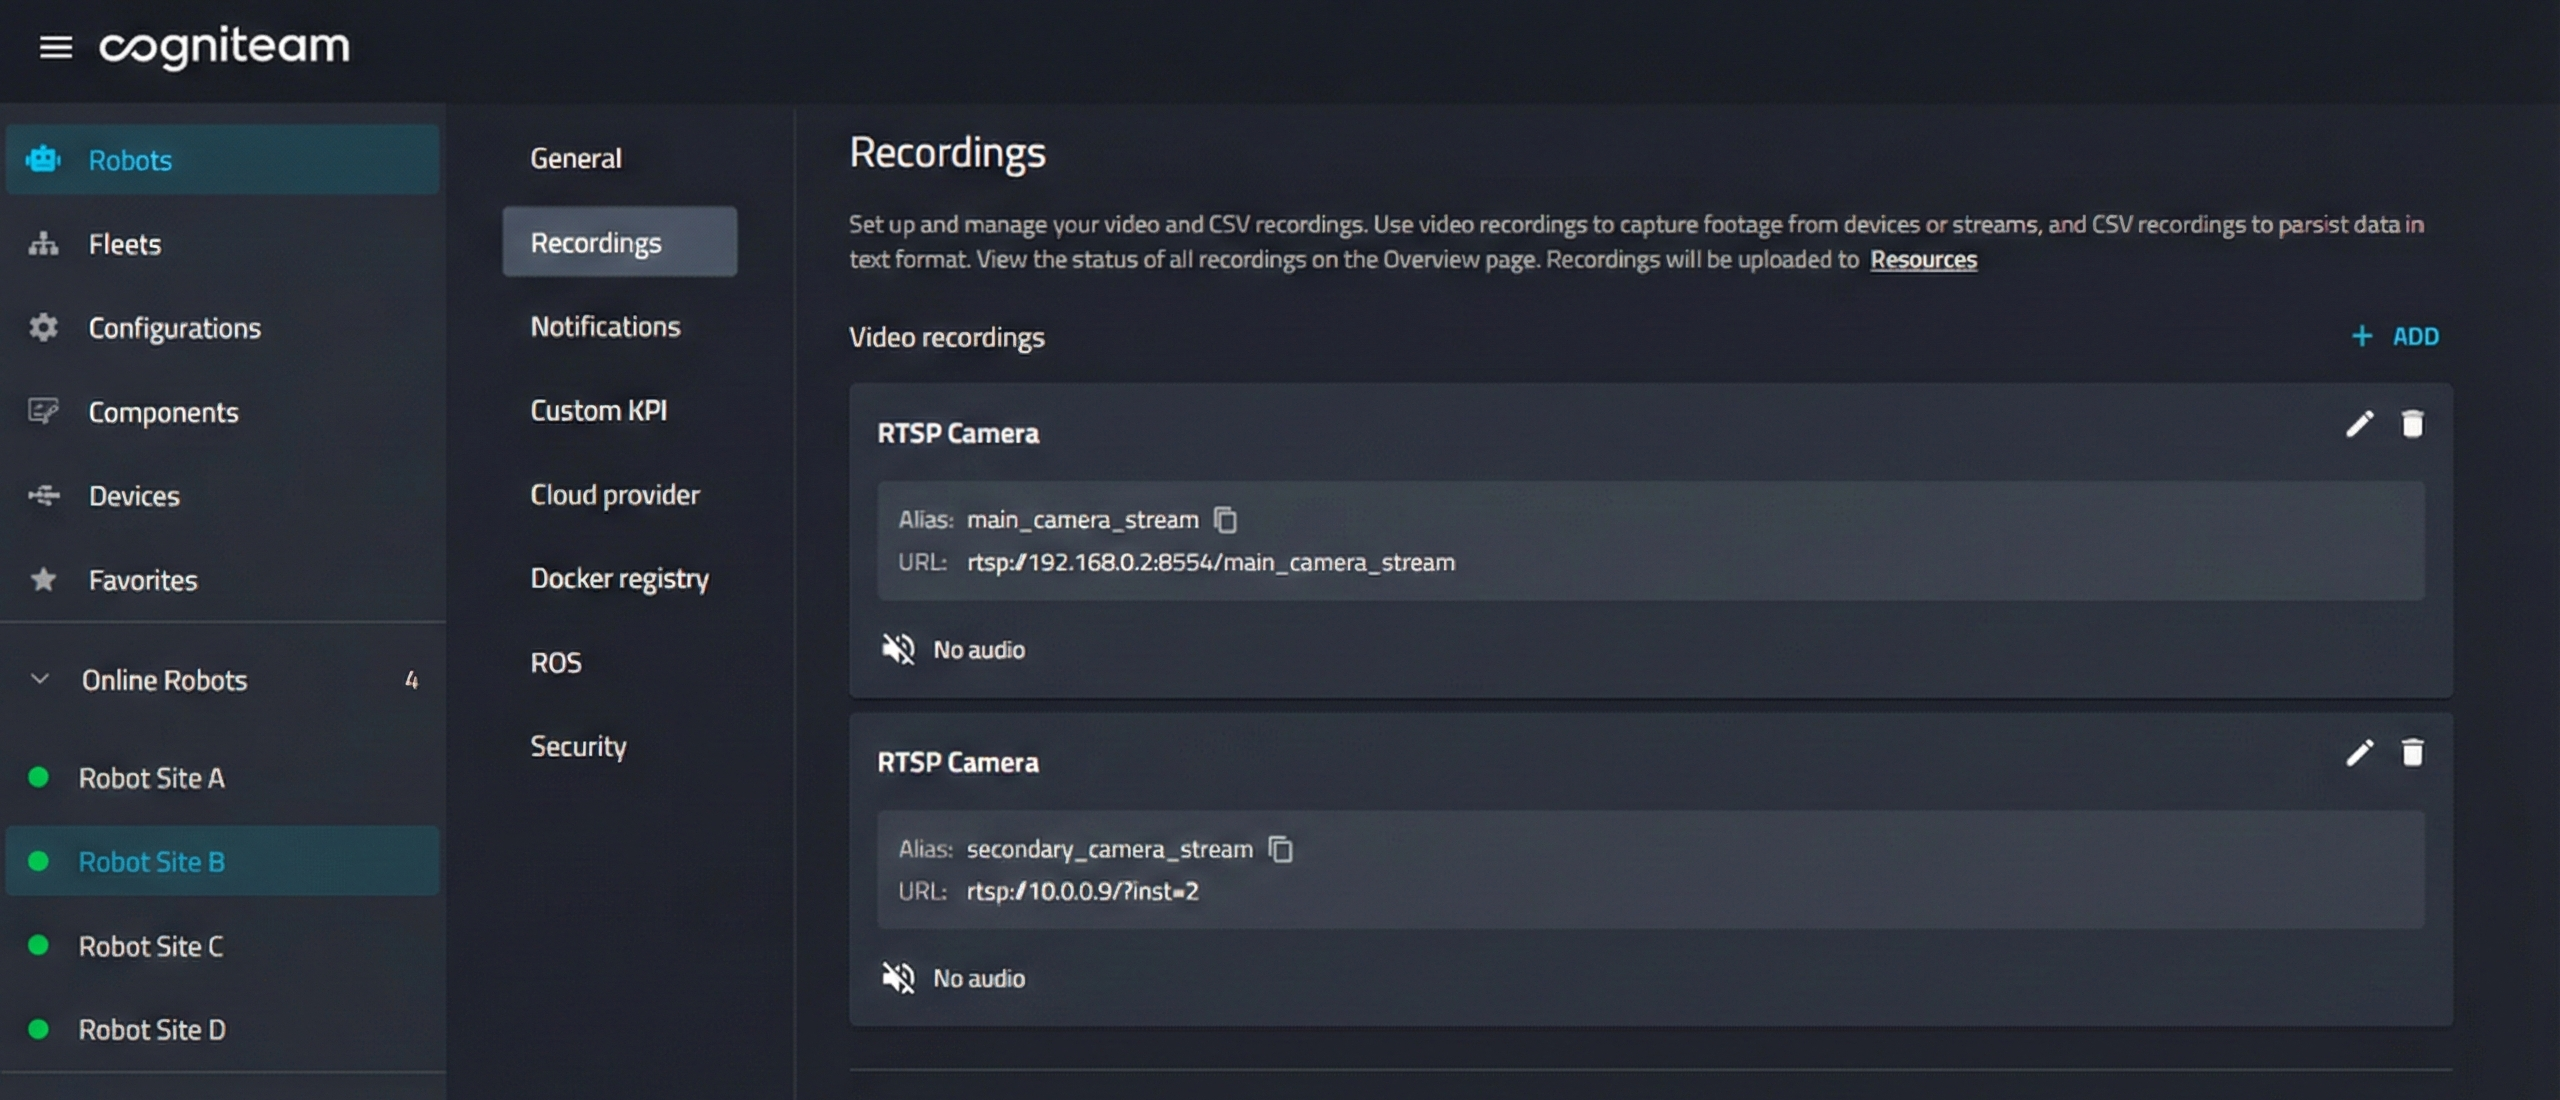
Recordings tab
Use the Recordings page to review video, event, and CSV recordings that were captured by the robot and uploaded to the configured storage provider.
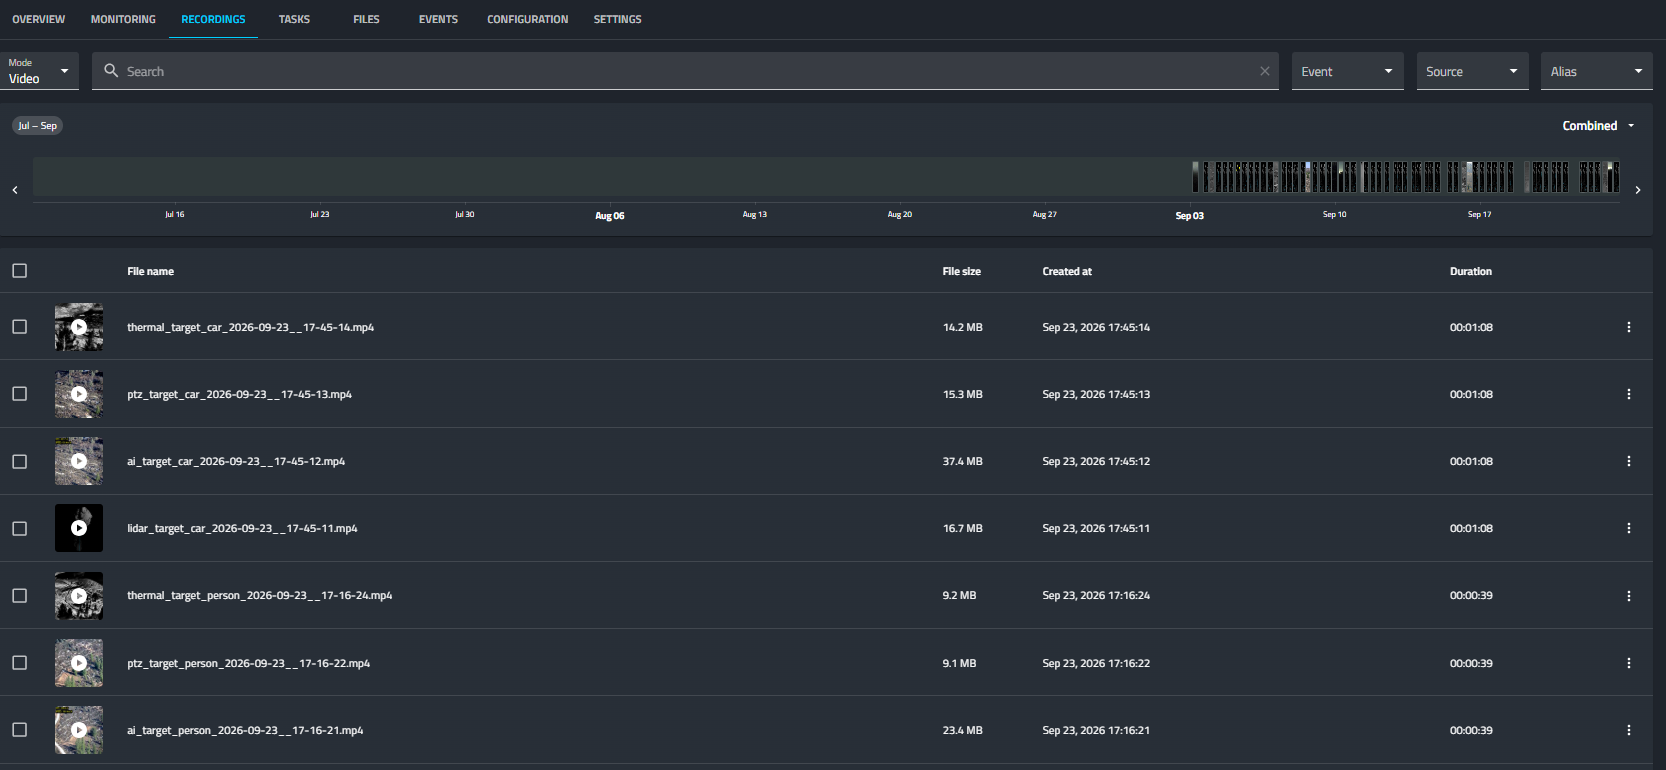
The page includes:
- A timeline for browsing recordings by time.
- A mode selector for Video, Events, and CSV recordings.
- A search field for filtering by file name or recording metadata.
- Filters for Event, Source, and Alias, so operators can narrow the list to a specific camera, stream, or event type.
- Timeline bars for CSV recordings, so data logs can be reviewed alongside visual recordings.
- A summary header with the selected date range and grouping controls.
- A group-by menu that shows only grouping options that exist in the current summary. Empty grouping values are shown as Unset.
- Stable event tag colors for event labels and filter chips.
Use the timeline to move between recording periods and inspect activity density before opening a file. Scroll over the timeline to zoom in or out around a point in time, then drag or use the side arrows to move through adjacent time ranges. This makes it easier to move from a long operating window to a precise minute or second where a recording was captured.
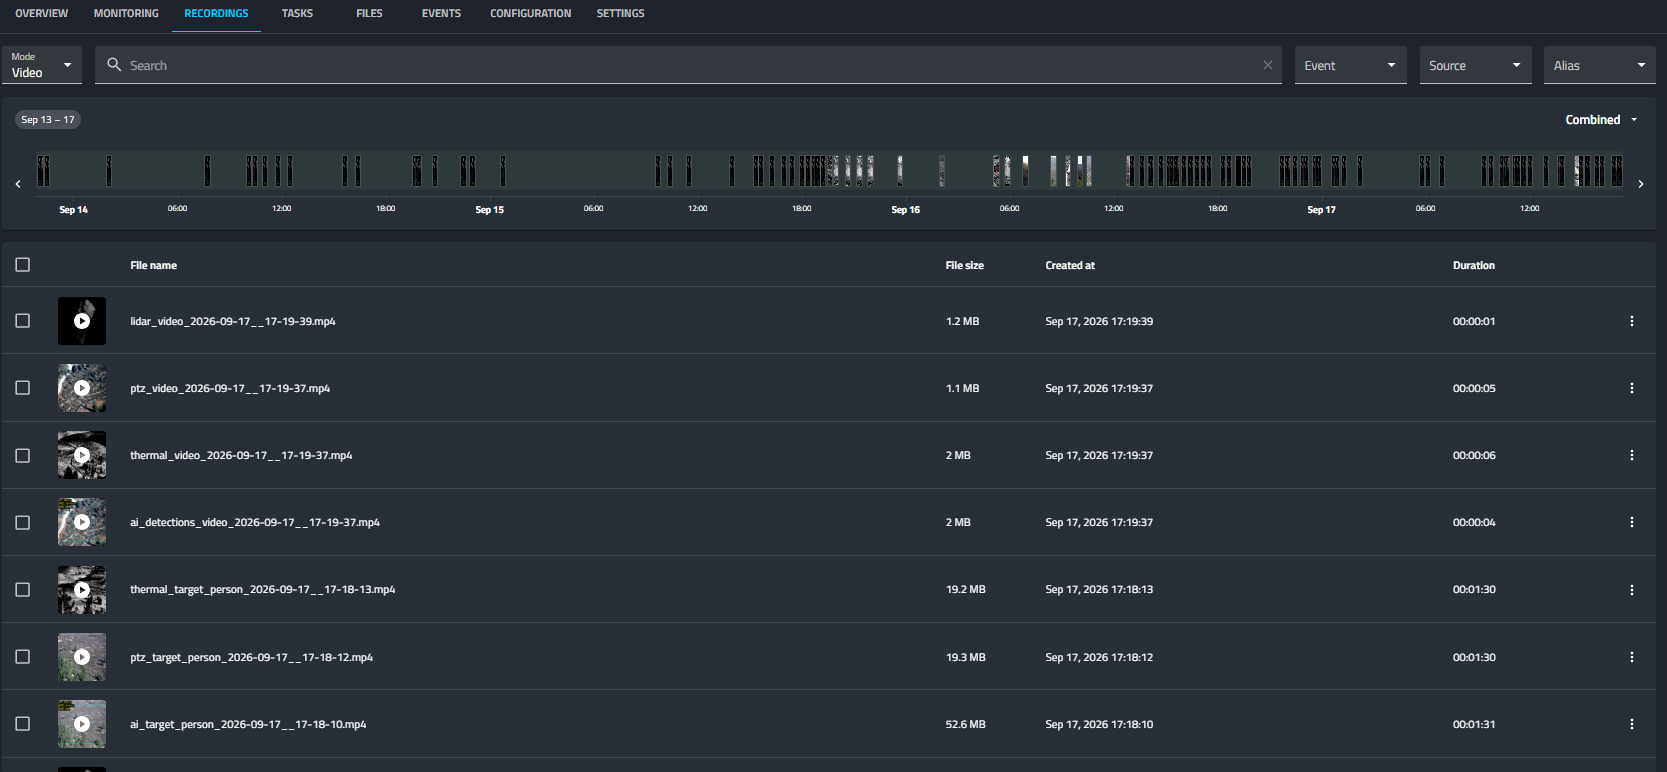
The timeline can zoom out to longer operating windows, up to 365 days. Videos and events remain visible at the edges of the selected range, making it easier to find recordings that start before or end after the visible window. After filtering, the file table updates to show only matching recordings while the timeline keeps the surrounding time context visible.
Video Recordings
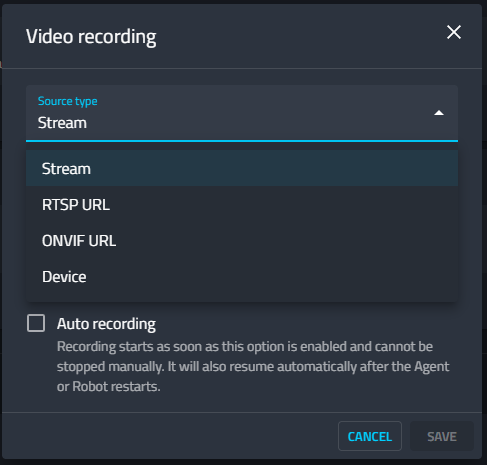
You can add video sources using four different methods:
- ROS stream
- RTSP
- ONVIF
- USB device
General Options:
- Alias: A unique name for the recording profile (e.g.,
lidar_video,usb_cam). Required for CLI control.- Auto recording: If checked, recording starts automatically when the Agent/Robot starts. In such a case recordings will be continously uploaded to the cloud using chunks of 15-30min depending on the video quality. When no space is left in the cloud data will be rotated based on space constraints.
- Recording quality: Choose the preferred quality for video recordings. Higher quality uses more local CPU and storage and increases cloud storage usage.
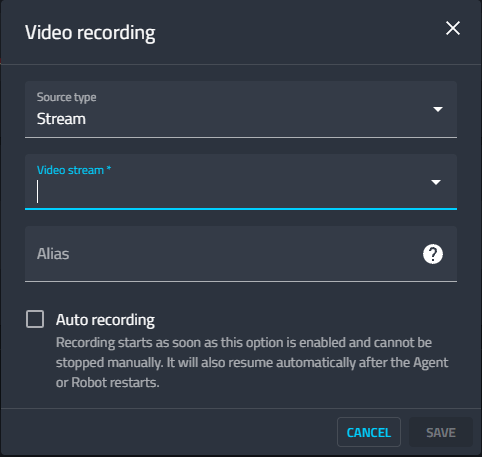
ROS1/2 Stream
Select from existing ROS1/2 video streams already recognized by the robot's internal system.
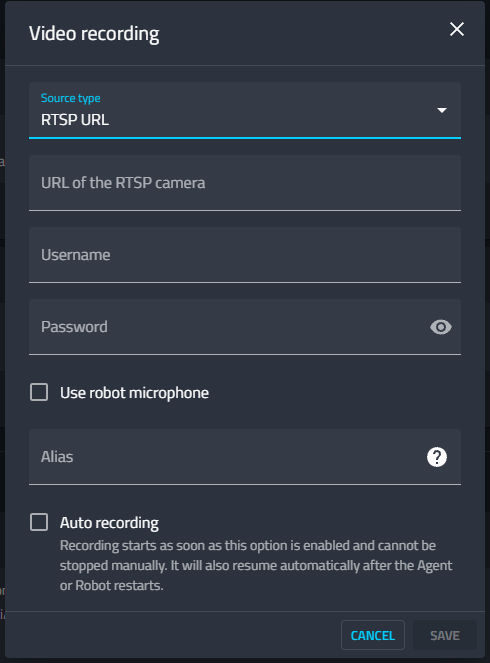
RTSP
- Connect directly to an IP camera stream.
- Input: RTSP URL (e.g.,
rtsp://192.168.0.2:8554/feed), Username, Password.
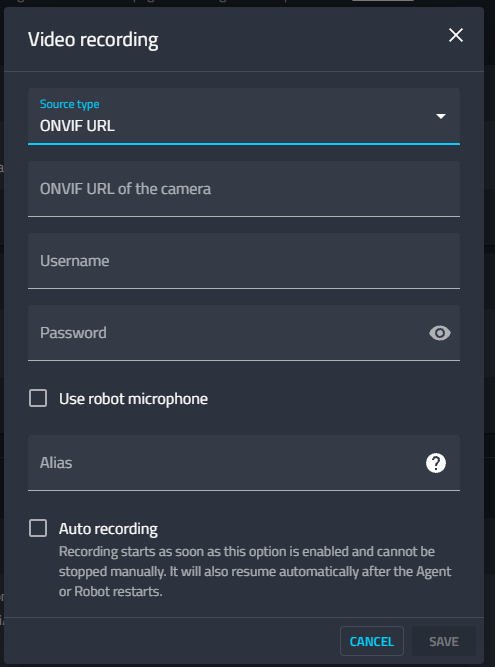
ONVIF
- Connect to ONVIF-compliant security cameras for standardized control.
- Onvif supported devices on the LAN will be automatically recognized
- Input: ONVIF URL, Username, Password.
USB Device
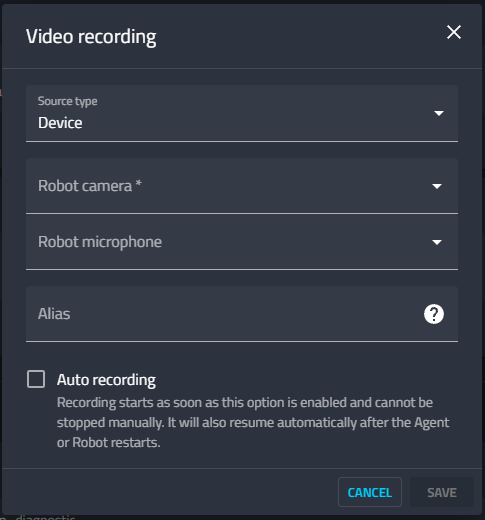
- Select physical USB devices directly connected to the robot.
- Configuration: Select the specific "Robot camera" and optional "Robot microphone" from the dropdowns.

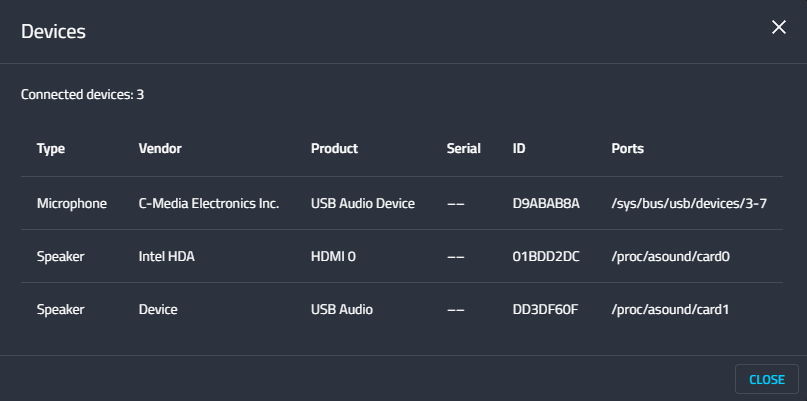
- Prerequisite: Devices must be recognized by the robot OS. You can verify connected hardware (Cameras, Microphones, Speakers) in the Devices section of the robot overview page.
DVR Event Buffering (Smart Recording)
When a recording event is triggered, the DVR system uses a buffering mechanism to capture context.
- Pre-Event Buffer: The system captures the 30 seconds immediately preceding the start trigger.
- Post-Event Buffer: The system continues capturing for 30 seconds after the stop trigger is received.
This ensures that the final video file includes the full context of the event, not just the moment the command was issued. Combine buffering with rule-based triggers for completely hands-free capture.
Use the Cogniteam Agent CLI to trigger or monitor recordings defined in the cloud and on the device. Refer to the Nimbus CLI reference for the complete command list and parameter descriptions.
Commands rely on the Alias defined in the Cloud Configuration section and support recording at once with a single alias multiple combination of streaming sources.
Trigger or stop managed (cloud-defined) DVR recorders with the segment commands:
nimbus datalog start-segment cam01
nimbus datalog stop-segment cam01
CSV Recordings
Persist non-visual data (telemetry, diagnostics) into text/CSV format.
- Topic Configuration: Map a ROS topic (e.g.,
/lidar_motion/diagnostic) to a CSV file. - Data Mapping: Define which specific fields (e.g.,
total_voxels,current_clusters) from the ROS message are written to columns in the CSV. - Profile names and IDs: CSV recordings use the configured profile name and ID when available. Older profiles without these fields remain supported.
CSV recordings appear on the Recording (VMS) page together with video and event recordings. Use the CSV mode to focus the timeline on data logs.