Configurations
When clicking the “configurations” tab you are faced with a choice:

But wait, what is a configuration?!
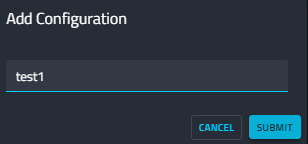
Let’s click on “create new configuration” to understand. First, type a name and push the submit button.
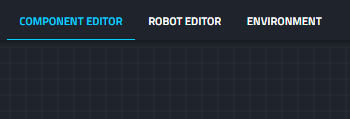
Now, we are in the component editor tab. Our configuration is empty.
Adding a component
Let’s click on the + button to add a new component.
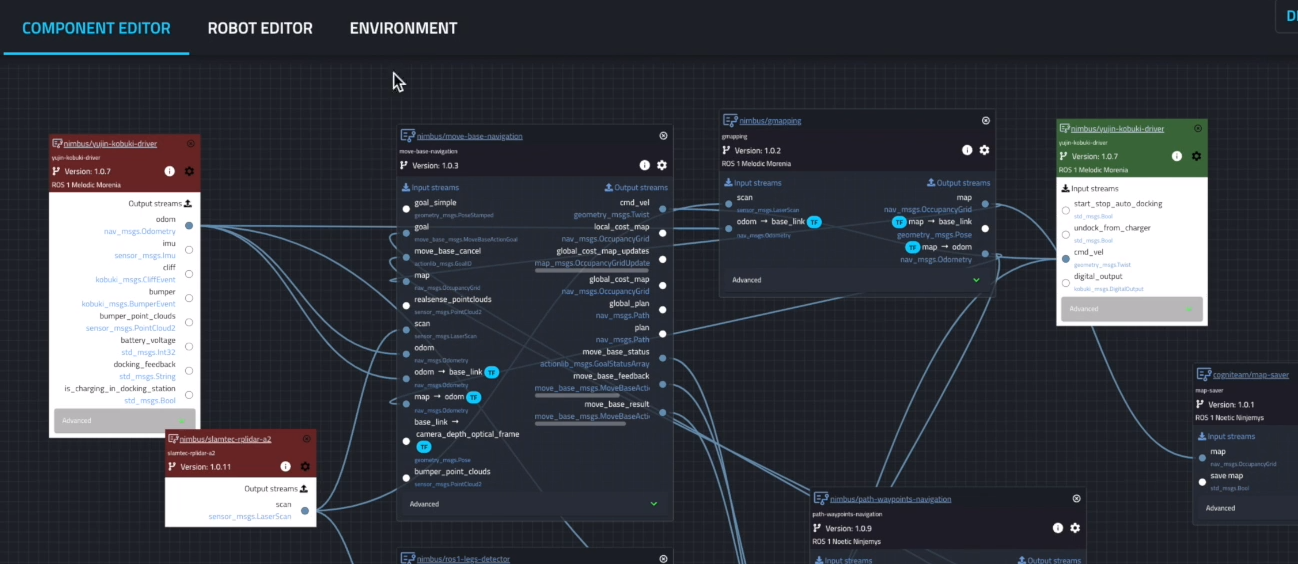
A component is a block which represents some dockerized process. These dockers may contain a driver for some device, for instance, a camera driver, or some algorithm such as SLAM or object recognition. Since these components are dockerized they contain all the necessary dependencies, e.g., OS libraries, ROS1/ ROS2 project, native code etc. As such, it is easy to deploy them on the robot and compose a behavioral graph where the streams from some sensor driver components (e.g., camera, odometry, laser scan) serve as the input for some algorithmic components (e.g., object detection, Nav2, Move base) which in turn, pass streams to other algorithmic components, until commands are sent through the driver components which in turn, manipulate the robot, closing the sense-think-act cycle.
Now we can understand the window that is opened.
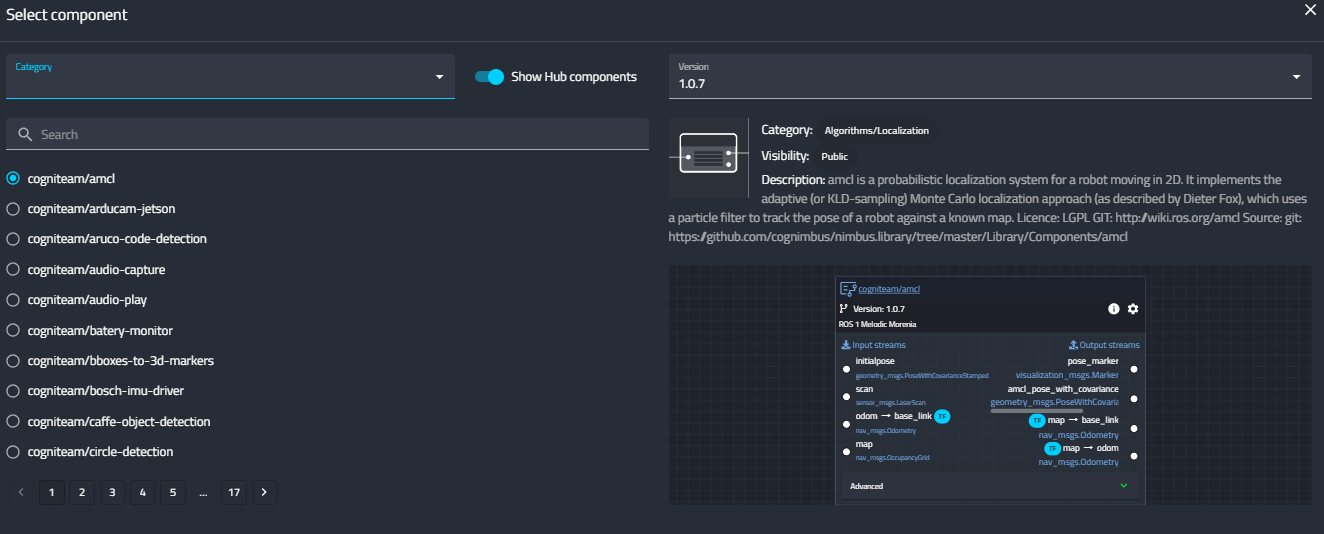

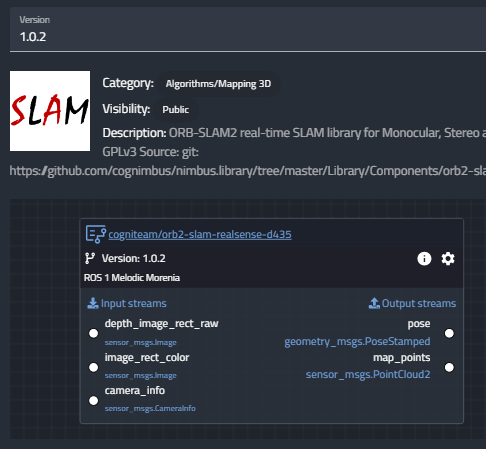
The Cogniteam Cloud Platform has a HUB filled with many ready to use components. So to choose an existing one we must filter our search. Let’s choose a category from the drop down menu. As you can see, there are many categories of algorithms and drivers. After narrowing down the list, we can select a desired component, and see its description on the right side. For instance, the following image describes a Mapping 3D algorithm. You can see its current version, the category, its visibility (public / private), a short description, and a link to the open-source project in GIT. Below, you can see the graphic representation of this component, where the input streams are on the left, and the output streams are on the right. Each component has a unique configuration accessible from the gear menu, the details of which are available in the component’s documentation
Composing a Behavioral Graph
When you click confirm, the component is added to the configuration and you can compose your computational graph by connecting output streams of one component to the input stream of another. Note that red components represent drivers of sensors which only have output streams, and green components represent drivers of actuators that are able to receive input streams with instructions.
We made this large library so you can focus on your main business core, and for everything else just plug & play read made components. However, it is not a must. You can create your own

components or simply use ROS1 / ROS2 and use our platform to monitor and control your robots.
You can deploy this version of configuration to a single robot or to the entire fleet. You can also revert to previous versions, much like in a version control software like GIT.
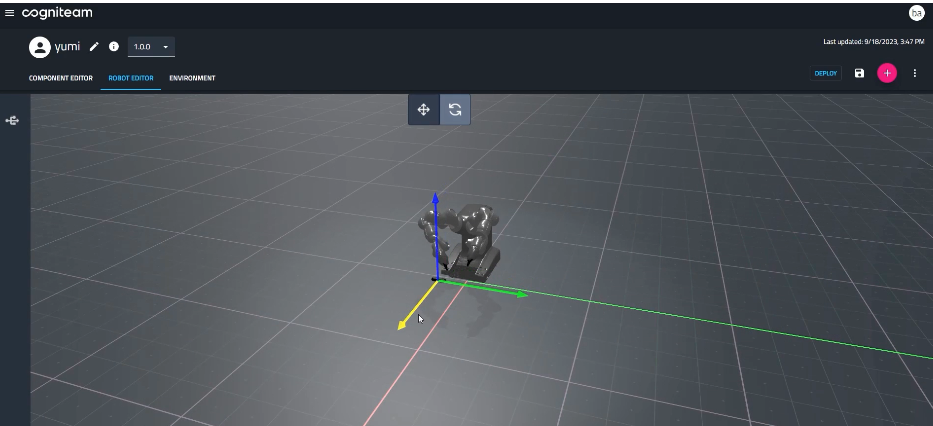
Robot Editor

Moving to the robot editor tab of the configuration, here we can create the digital twin of our robot, to use in our Simulation.
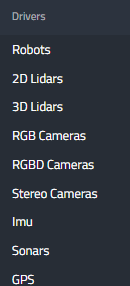
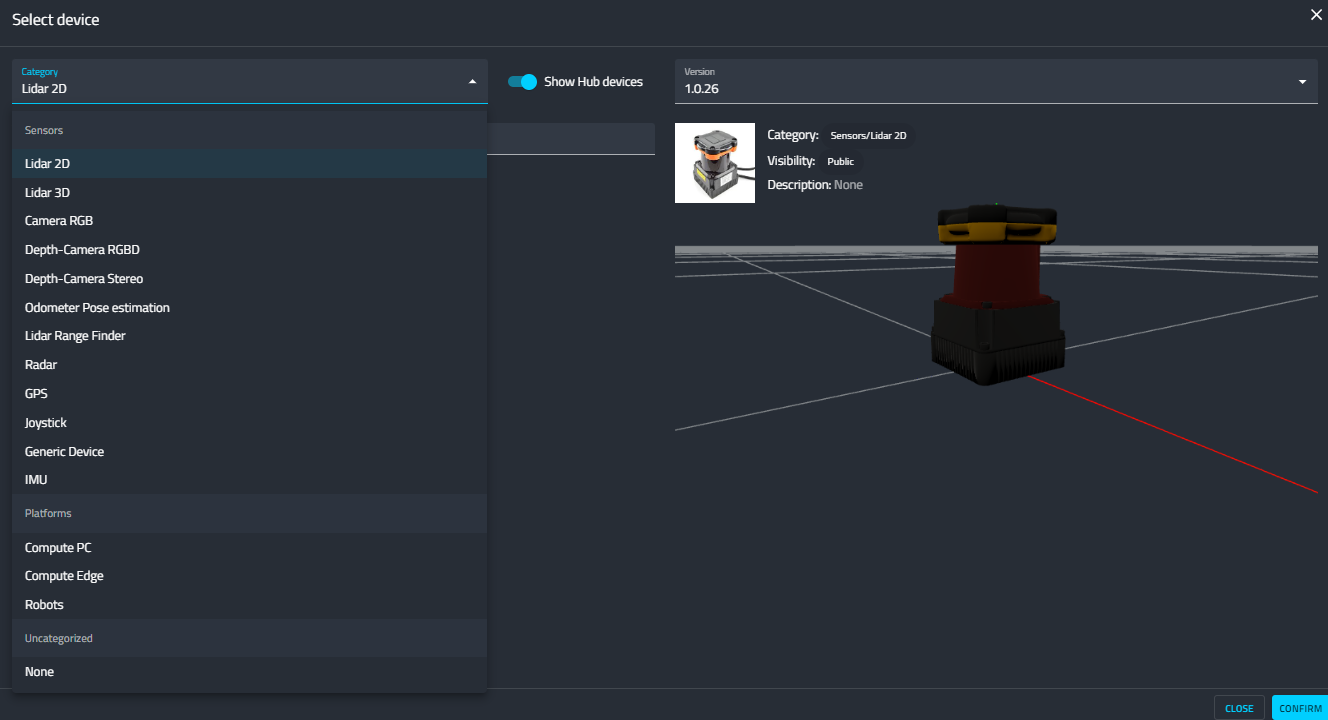
In a similar fashion to adding components, here we can add devices, i.e., sensors and robotic platforms. Each device is a 3D representation of some common off-the-shelf physical device you can integrate into your robot.
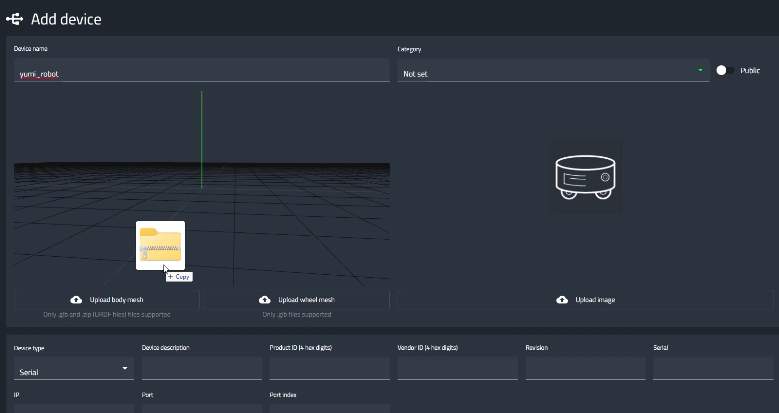
After the addition of a device you can set its 3D position on the robot. You can also import a URDF (just drag & drop) or use our system to build a robot and export a URDF.
After completing creating your robot’s physical twin, you are ready to test it’s behavioral configuration in the Simulation, but first, you need to set up the environment.
Environment Tab
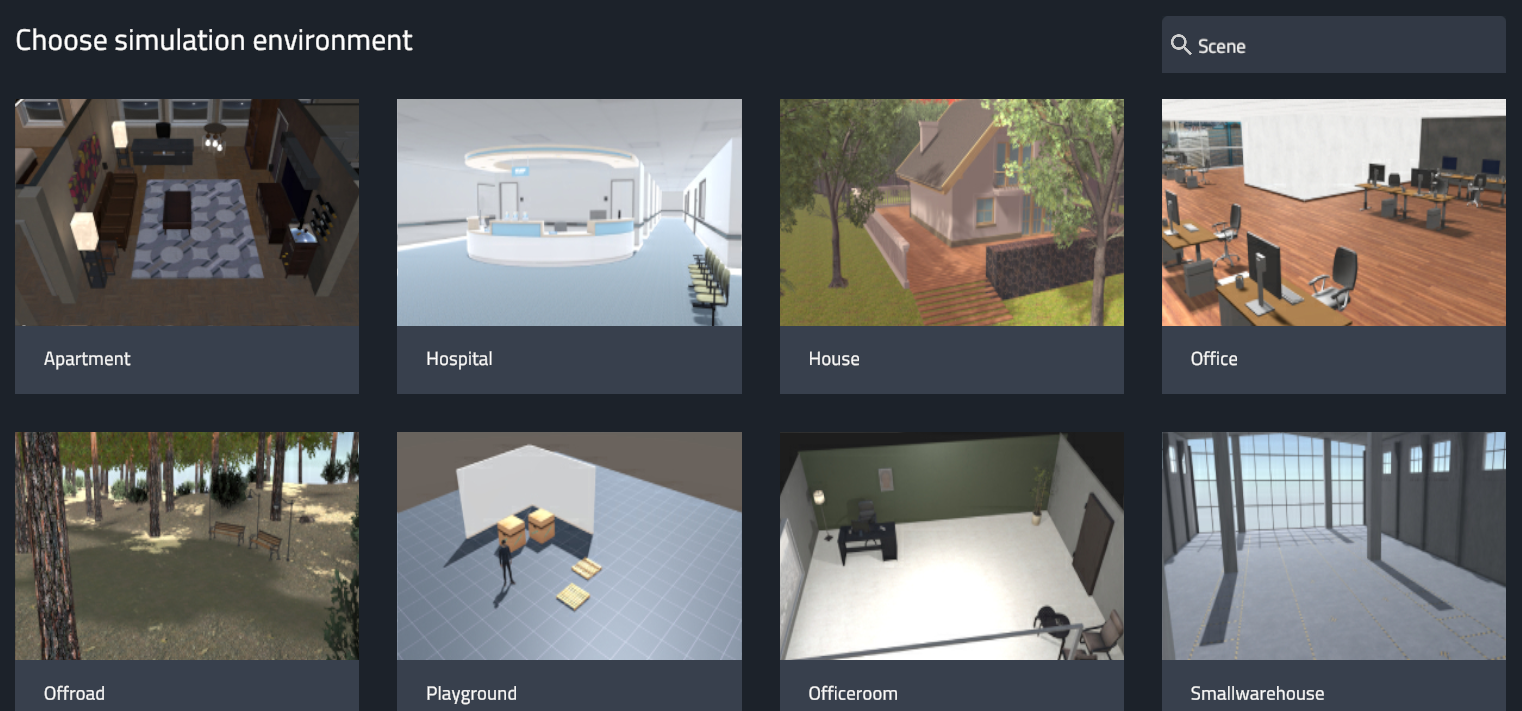
You can choose one of our many ready-made environments, or contact us to create a project that meets your specific needs.
You can set up different scenarios in the environment by utilizing our “dropables”. Please refer to the following video tutorial to see how.
Now we are ready to see our robot in action in Cogniteam’s Platform Simulation.